DIY Tar Driveway: Transforming your property with a durable and affordable driveway is within reach. This guide provides a comprehensive approach to building your own tar driveway, covering everything from planning and preparation to finishing touches and maintenance.
Creating a tar driveway offers a blend of affordability and durability, making it a popular choice for homeowners. Whether you’re looking to enhance curb appeal or simply need a reliable surface for parking, a DIY tar driveway project can be a rewarding endeavor. This guide will equip you with the knowledge and steps to confidently embark on this project.
Understanding DIY Tar Driveway Basics
A tar driveway, also known as an asphalt driveway, offers several advantages, making it a popular choice for homeowners. It’s durable, requires minimal maintenance, and can enhance the curb appeal of your property.
Types of Tar Used for Driveways
The type of tar used for driveways significantly impacts its durability and performance. Here are the common types:
- Asphalt Concrete: This is the most popular type of tar used for driveways. It’s a mixture of aggregates, asphalt cement, and fillers. Asphalt concrete is durable, weather-resistant, and affordable.
- Asphalt Emulsion: This is a water-based asphalt mixture that’s easier to apply than asphalt concrete. It’s often used for smaller projects or repairs. However, it’s not as durable as asphalt concrete.
- Asphalt Sealcoat: This is a thin layer of asphalt applied to existing asphalt driveways to protect them from damage and extend their lifespan. It’s typically applied every few years.
Tools and Equipment Needed for a DIY Tar Driveway Project
Having the right tools and equipment is crucial for a successful DIY tar driveway project. Here’s a list of essentials:
- Shovels: You’ll need shovels to move the gravel and prepare the base for the tar.
- Rakes: Rakes are used to level the gravel and smooth out the surface before applying the tar.
- Tampers: Tampers compact the gravel base, ensuring a stable foundation for the tar.
- Wheelbarrow: A wheelbarrow is essential for transporting materials and moving the tar around the driveway.
- Tar Kettle: A tar kettle is used to melt and heat the tar to the correct temperature for application.
- Tar Rake: A tar rake is used to spread the hot tar evenly over the driveway surface.
- Safety Gear: Always wear safety gear, including gloves, goggles, and a respirator mask, when working with hot tar.
Preparing the Driveway Area
Before you start laying down tar, you need to prepare a solid foundation for your driveway. This involves clearing the area, leveling the ground, and compacting the soil.
Clearing the Driveway Site
The first step is to clear the area where you want to build your driveway. This involves removing any existing vegetation, debris, and obstacles.
- Use a shovel, rake, or other tools to remove any grass, weeds, or other vegetation.
- Remove any rocks, tree roots, or other obstacles that could interfere with the driveway construction.
- If you have any existing pavement, you will need to remove it before you can lay down the new driveway.
Leveling the Driveway Area
Once the area is cleared, you need to level the ground. This will ensure that your driveway is flat and even.
- Use a level to check the slope of the ground. The driveway should have a slight slope to allow for drainage.
- Use a shovel, rake, or other tools to add or remove soil to level the ground.
- If you have a large area to level, you may want to rent a grader or other heavy equipment.
Compacting the Soil
Once the ground is level, you need to compact the soil. This will create a stable foundation for your driveway.
- Use a hand tamper, plate compactor, or other compaction equipment to compact the soil.
- Compact the soil in layers, working from the bottom up.
- Compact the soil until it is firm and dense.
Ensuring Proper Drainage
Proper drainage is essential to prevent water buildup on your driveway.
- Ensure the driveway has a slight slope to allow for drainage.
- Install drainage ditches or gutters to collect and direct water away from the driveway.
- If you have a lot of clay soil, you may want to consider adding a layer of gravel to improve drainage.
Laying the Tar Base

This is the heart of your DIY tar driveway project. Here, you’ll be spreading and compacting the tar base, ensuring a smooth and even surface that will support your driveway for years to come.
Creating a Smooth and Even Surface
A smooth and even tar base is essential for a durable and aesthetically pleasing driveway. Here’s how to achieve this:
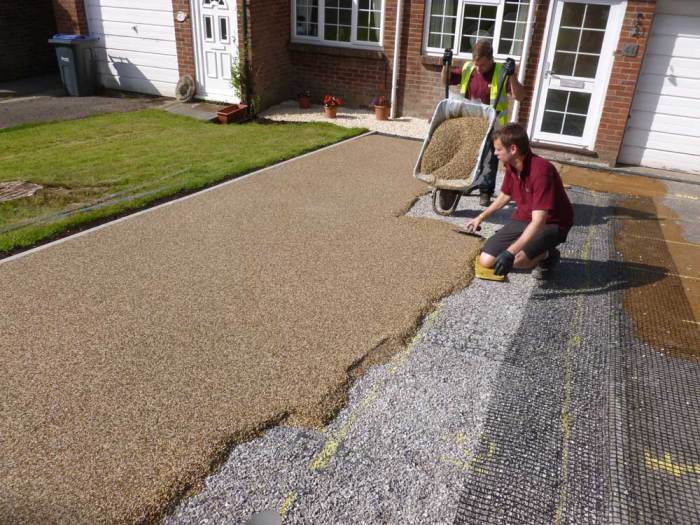
- Use a shovel or rake to spread the tar evenly. Work in sections, starting at one end of the driveway and moving towards the other. Ensure the tar is spread to the desired thickness, typically 2-3 inches.
- Use a tamper or roller to compact the tar. This will remove air pockets and create a solid base. Compact the tar in overlapping passes, working from the edges towards the center of the driveway.
- Check for low spots and high spots. Use a level or straight edge to check for any inconsistencies in the surface. If you find any, add more tar to low spots or remove excess tar from high spots.
- Repeat the process until the surface is smooth and even. You may need to add more tar and compact it several times to achieve the desired results.
Creating a Proper Slope for Drainage
Proper drainage is crucial to prevent water from pooling on your driveway and causing damage. Here’s how to create a slope:
- Determine the direction of the slope. The slope should generally be away from your house or any structures.
- Use a level to create a consistent slope. The slope should be gradual, typically about 1/4 inch per foot.
- Adjust the tar thickness to create the slope. Add more tar to the lower end of the driveway and less tar to the higher end.
Safety Considerations: Diy Tar Driveway

Working with tar requires careful attention to safety to prevent accidents and injuries. Tar is a hazardous material that can cause burns, respiratory problems, and other health issues if not handled properly. This section Artikels important safety considerations for working with tar and ensures a safe and successful DIY tar driveway project.
Safe Handling and Disposal of Tar
Safe handling and disposal of tar are crucial to prevent potential hazards.
- Store Tar Properly: Tar should be stored in a cool, dry, and well-ventilated area. Avoid storing it in direct sunlight or extreme temperatures, as this can affect its viscosity and make it more difficult to handle. Store it in tightly sealed containers to prevent spills and evaporation.
- Use Protective Gear: Always wear appropriate personal protective equipment (PPE) when handling tar, including heavy-duty gloves, a respirator mask, safety goggles, and long-sleeved clothing. This will protect your skin and respiratory system from contact with tar fumes and prevent accidental spills.
- Avoid Contact with Skin: Tar can cause severe skin burns and irritation. If you come into contact with tar, remove contaminated clothing immediately and wash the affected area with soap and water. Consult a doctor if irritation persists.
- Dispose of Tar Safely: Dispose of tar properly according to local regulations. Do not pour it down the drain or into the environment. Contact your local waste management agency for information on proper disposal methods.
Importance of Wearing Appropriate Safety Gear
Wearing appropriate safety gear is crucial when working with tar.
- Gloves: Heavy-duty gloves, such as nitrile or neoprene gloves, are essential to protect your hands from burns and irritation. Choose gloves that are resistant to chemicals and have a good grip.
- Respirator Mask: A respirator mask with an organic vapor cartridge is necessary to protect your respiratory system from inhaling tar fumes. Ensure the mask fits snugly and is properly maintained.
- Safety Goggles: Safety goggles protect your eyes from tar splashes and debris. Choose goggles that provide adequate protection and are comfortable to wear.
- Long-Sleeved Clothing: Wear long-sleeved clothing to protect your skin from contact with tar. Choose clothing made of durable material that is resistant to heat and chemicals.
- Safety Boots: Safety boots with steel toes and slip-resistant soles are essential for protecting your feet from potential hazards, such as falling objects or hot tar.
Cost Estimation and Budget
A DIY tar driveway project can be significantly cheaper than hiring a professional, but you still need to consider the costs involved. By carefully planning and budgeting, you can ensure that your project stays within your financial limits.
Material Costs
Material costs are a major factor in the overall cost of a DIY tar driveway. The specific materials you’ll need will depend on the size and type of driveway you’re building. Here’s a breakdown of the typical costs:
- Tar: Tar is the main ingredient in a tar driveway, and its cost will vary depending on the quality and quantity you need. Expect to pay between $25 and $50 per gallon.
- Gravel: Gravel is used as a base for the tar driveway. The amount of gravel you’ll need will depend on the size and depth of your driveway. Gravel typically costs between $20 and $40 per cubic yard.
- Sand: Sand is used to level the driveway and create a smooth surface. You’ll need a few cubic yards of sand, and it typically costs between $15 and $30 per cubic yard.
- Tools: You’ll need various tools for your project, including a shovel, rake, wheelbarrow, tamper, and possibly a roller. You may be able to rent some of these tools to save money.
Labor Costs
While you’re doing the work yourself, you’ll still need to factor in the cost of your time and effort. It’s essential to be realistic about how long the project will take. A typical driveway project can take several days, so factor in the cost of your time.
Saving Money on Materials and Labor
Here are some tips for saving money on materials and labor:
- Buy in bulk: Purchasing materials in bulk can often lead to significant discounts. If you have the space to store them, consider buying more than you need.
- Shop around for the best prices: Compare prices from different suppliers to get the best deal on materials.
- Consider using recycled materials: Recycled materials, such as crushed concrete or asphalt, can be significantly cheaper than new materials.
- Do the work yourself: The most significant cost savings come from doing the work yourself. You can save a lot of money by avoiding labor costs.
Cost Savings Compared to Hiring a Professional
Hiring a professional to install a tar driveway can be significantly more expensive than doing it yourself. A professional contractor will charge an hourly rate, plus the cost of materials. You can expect to pay several thousand dollars for a professional driveway installation. By doing the work yourself, you can save a significant amount of money.
Troubleshooting Common Issues

Even with careful planning and execution, problems can arise during a tar driveway project. Understanding these issues and knowing how to address them is crucial for a successful and long-lasting driveway.
Addressing Common Tar Driveway Issues
- Uneven Surface: A common problem is an uneven surface. This can occur due to improper grading or settling of the base material. To address this, you can use a leveling compound or a layer of additional gravel to smooth out the surface before applying the tar.
- Cracks and Potholes: Cracks and potholes can form over time due to temperature fluctuations, heavy traffic, or inadequate base preparation. These can be repaired by cleaning the affected area, applying a sealant, and filling the crack or pothole with a suitable patching compound.
- Tar Adhesion Issues: Poor adhesion of the tar to the base material can occur if the surface is not properly cleaned or if the tar is applied in cold weather. Ensure the surface is clean and dry, and apply the tar at the recommended temperature.
- Water Puddling: Puddling occurs when water accumulates on the driveway surface, often due to improper grading or drainage. To address this, ensure proper drainage by adjusting the slope of the driveway or installing drainage channels.
Maintaining and Extending Driveway Life
- Regular Cleaning: Regularly sweep or hose down the driveway to remove debris and prevent buildup that can damage the tar surface. Avoid using harsh chemicals or abrasive cleaners that can damage the tar.
- Sealing: Sealing the driveway every few years with a tar-based sealant helps protect the surface from the elements and extend its lifespan. This creates a protective barrier against UV rays, water damage, and weathering.
- Prevent Heavy Loads: Avoid parking heavy vehicles or equipment on the driveway, as this can put undue stress on the tar surface and lead to cracking or damage.
- Winter Maintenance: During winter, use a de-icer that is safe for tar surfaces to prevent damage from ice and snow. Avoid using a metal shovel that can scratch the surface.
Alternative Driveway Materials
While tar driveways are a popular choice, they aren’t the only option available. Exploring other materials can offer a range of benefits, including aesthetics, durability, and cost-effectiveness.
Comparing Driveway Materials
Understanding the pros and cons of different driveway materials is crucial for making an informed decision.
Pros and Cons of Different Driveway Materials
- Tar: Tar driveways are known for their affordability, durability, and ease of maintenance. They can withstand heavy traffic and weather conditions. However, they can be prone to cracking and require periodic sealing.
- Gravel: Gravel driveways are a budget-friendly option, offering excellent drainage and a natural look. They are relatively easy to install and maintain, but they can be dusty and require occasional replenishment.
- Concrete: Concrete driveways are highly durable and can withstand heavy loads. They offer a clean, modern look and require minimal maintenance. However, they can be expensive to install and prone to cracking if not properly installed.
- Pavers: Pavers offer a wide range of styles and colors, allowing for creative designs. They are durable, resistant to cracking, and easy to repair. However, they can be more expensive than other options and require specialized installation.
Suitability of Other Materials, Diy tar driveway
Each material has its own suitability based on factors like budget, traffic volume, aesthetic preferences, and climate.
Gravel Driveways
Gravel driveways are ideal for areas with high rainfall, as they allow water to drain quickly. They are also a good choice for properties with limited budgets, as they are relatively inexpensive to install. However, they can be dusty and require regular maintenance, such as adding gravel to fill in any gaps.
Concrete Driveways
Concrete driveways are a good choice for areas with heavy traffic, as they are very durable. They are also relatively low-maintenance, requiring only occasional cleaning and sealing. However, they can be expensive to install and may crack if not properly installed.
Paver Driveways
Paver driveways offer a wide range of design options, allowing you to create a unique and attractive driveway. They are also very durable and easy to repair, making them a good choice for areas with heavy traffic. However, they can be expensive to install and require specialized installation.
Cost, Durability, and Maintenance Comparison
| Material | Cost (Approximate) | Durability | Maintenance |
|---|---|---|---|
| Tar | $2-$5 per square foot | High | Moderate (sealing every few years) |
| Gravel | $1-$3 per square foot | Moderate | Low (occasional replenishment) |
| Concrete | $6-$12 per square foot | Very high | Low (occasional cleaning and sealing) |
| Pavers | $8-$20 per square foot | High | Moderate (occasional cleaning and repairs) |
Building your own tar driveway is a rewarding experience that combines practicality and aesthetic appeal. By following the steps Artikeld in this guide, you can create a durable and attractive driveway that enhances your property and reflects your personal style. Remember to prioritize safety, plan meticulously, and enjoy the process of bringing your vision to life.
A DIY tar driveway can be a great way to improve your home’s curb appeal and increase its value. While you’re working on your driveway, you might also want to consider adding some festive decorations, like a DIY outdoor manger scene, which you can find instructions for here. A manger scene can add a touch of holiday cheer to your yard and create a welcoming atmosphere for your guests.
After all, a well-maintained driveway and festive decorations go hand-in-hand!
