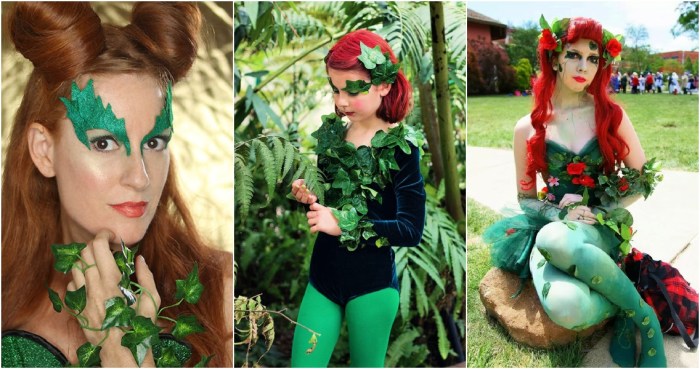
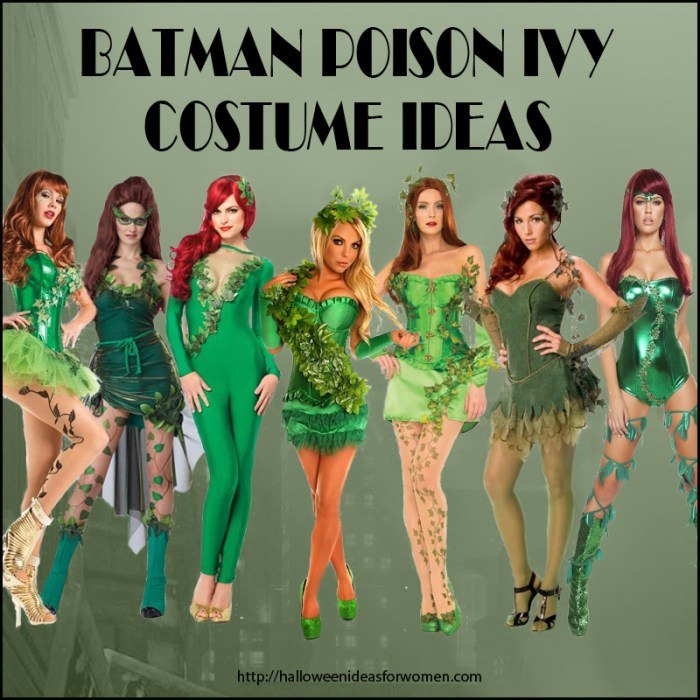
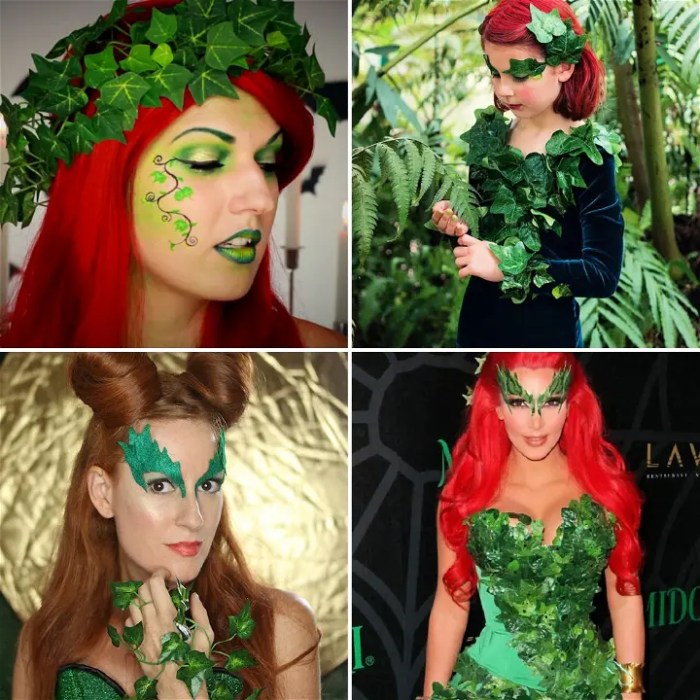
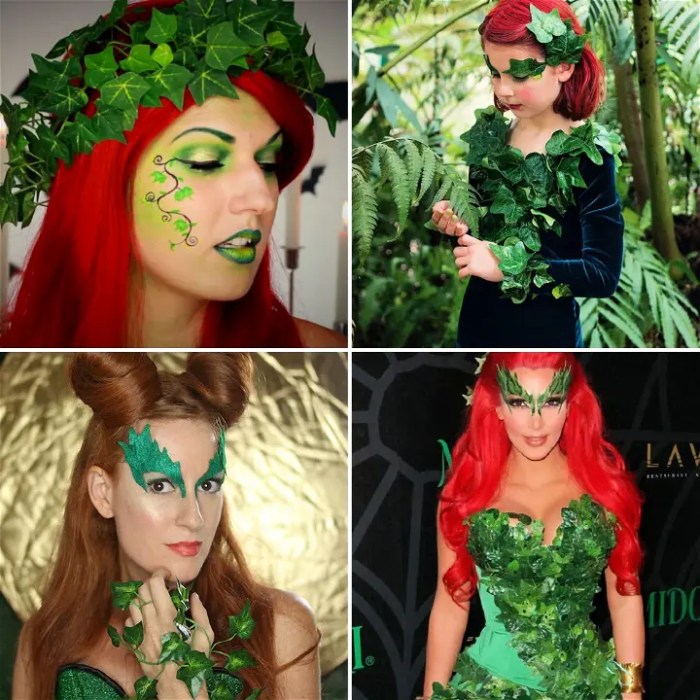
Green Ivy Costume DIY: Imagine yourself transformed into a living, breathing vine, adorned with lush, emerald foliage. This costume theme offers a unique and captivating opportunity to bring the beauty of nature to life. Whether you’re attending a Halloween party, a themed event, or simply seeking a creative outlet, a green ivy costume allows you to express your artistic side while embracing the natural world.
The appeal of this costume lies in its versatility. You can tailor it to your personal style, choosing from various ivy types, incorporating different shades of green, and adding unique accessories to create a look that’s truly your own. Whether you’re aiming for a whimsical, ethereal vibe or a more dramatic and intricate design, the possibilities are endless.
Green Ivy Costume: A Versatile and Enchanting Choice
The green ivy costume offers a unique and captivating opportunity to embrace nature’s beauty. This costume theme is perfect for anyone who wants to embody the charm of the natural world, creating a look that is both whimsical and sophisticated. Its versatility allows for a wide range of interpretations, making it suitable for various events and occasions.
The Appeal of the Green Ivy Costume
The appeal of the green ivy costume lies in its ability to evoke a sense of wonder and connection to nature. The intricate details of ivy leaves and vines, along with their vibrant green hues, create a visually striking and alluring aesthetic. This costume theme can be adapted to fit different personalities and styles, from whimsical and playful to elegant and sophisticated.
Versatility for Different Events
The green ivy costume is incredibly versatile, making it suitable for a variety of events and occasions. It can be adapted for:
- Halloween: A classic choice for Halloween, the green ivy costume can be styled as a whimsical fairy, a mysterious forest creature, or even a spooky vine-covered monster.
- Costume Parties: The green ivy costume is perfect for costume parties with nature-inspired themes, such as “Enchanted Forest” or “Garden Party”.
- Festivals: The green ivy costume can be worn to festivals like music festivals or Renaissance Fairs, adding a touch of whimsy and charm to the event.
- Theatrical Productions: The green ivy costume can be used in theatrical productions, especially those with nature-related themes or set in enchanted forests.
Costume Design Inspiration

Drawing inspiration from the natural world is a great way to create a unique and visually appealing costume. Ivy, with its intricate patterns and vibrant colors, offers a wealth of possibilities for a captivating costume design.
Types of Ivy and Their Visual Variations
Ivy is a versatile plant, and its various types offer a range of visual variations. These differences can be incorporated into a costume design to create unique looks.
- English Ivy (Hedera helix): This common type features dark green leaves with distinctive five-pointed lobes. Its ability to climb and cover surfaces can inspire a costume design that drapes and flows.
- Boston Ivy (Parthenocissus tricuspidata): With its large, three-lobed leaves, Boston ivy offers a bolder visual statement. Its leaves turn vibrant red in the fall, providing a striking color contrast.
- Japanese Ivy (Parthenocissus japonica): Known for its glossy, dark green leaves and vigorous growth, Japanese ivy can inspire a costume with a sleek and elegant feel.
Incorporating Ivy Textures and Colors
The texture and color of ivy can be effectively incorporated into a costume design to create a truly immersive look.
- Texture: The intricate patterns and textures of ivy leaves can be replicated using various materials, such as fabric, felt, or even paper. For a more realistic look, consider using a combination of textures, mimicking the different stages of ivy growth.
- Color: The vibrant green hues of ivy can be incorporated into a costume through fabric choices, paint, or even natural dyes. Consider adding accents of other colors, such as the red of autumn leaves or the purple of ivy flowers, to create a more dynamic look.
Materials and Tools
Constructing a Green Ivy costume requires a variety of materials, carefully chosen to achieve the desired effect. This section Artikels the essential materials and tools needed for crafting a captivating Green Ivy costume.
Fabric
The choice of fabric is paramount in achieving the desired look and feel for your Green Ivy costume. The fabric should be lightweight, comfortable, and drape well to mimic the cascading effect of ivy. Here are some suitable options:
- Green Satin: This fabric offers a smooth, luxurious texture, providing a glossy finish that evokes the vibrancy of fresh leaves. Satin’s drape and sheen contribute to the illusion of movement and life.
- Green Chiffon: Known for its airy, delicate nature, chiffon drapes beautifully, creating a soft, ethereal effect reminiscent of ivy’s graceful tendrils.
- Green Organza: This sheer, translucent fabric is a great choice for adding a layer of texture and dimension to your costume. Organza can be used to create cascading leaves or delicate vines.
- Green Velvet: For a more luxurious and dramatic look, velvet can be used to create a rich, textured costume. Velvet’s soft pile adds depth and visual interest, mimicking the velvety texture of real ivy.
Accessories
Accessories play a vital role in completing the Green Ivy costume, adding detail and authenticity to the overall design. Here are some essential accessories to consider:
- Ivy Garland: A classic element of any Green Ivy costume, an ivy garland can be crafted from artificial ivy vines or real ivy leaves. The garland can be worn around the head, draped over the shoulders, or incorporated into the costume design.
- Green Leaf Appliqués: These can be made from felt, fabric, or other materials and attached to the costume to create a more intricate and realistic look.
- Green Fabric Flowers: These can be made from fabric scraps or purchased from craft stores. Green fabric flowers add a touch of elegance and femininity to the costume.
- Green Makeup: Using green makeup to accentuate your features can enhance the overall green ivy theme. Consider applying green eyeshadow, eyeliner, or lipstick.
- Green Jewelry: Green necklaces, earrings, or bracelets can complement the costume, adding a touch of sparkle and sophistication.
Tools
The tools used for crafting a Green Ivy costume are essential for ensuring a smooth and successful construction process. Here are some essential tools to gather:
- Sewing Machine: A sewing machine is necessary for stitching together the fabric pieces of your costume.
- Scissors: Sharp scissors are crucial for cutting fabric, trimming seams, and shaping accessories.
- Pins: Pins are essential for holding fabric pieces together while sewing.
- Measuring Tape: A measuring tape is needed for accurately measuring fabric and body measurements.
- Fabric Glue: Fabric glue can be used to secure accessories to the costume, such as leaf appliqués or flowers.
- Hot Glue Gun: A hot glue gun can be used for quickly and securely attaching accessories to the costume.
Building the Base
The bodysuit serves as the foundation of your Green Ivy costume, providing a smooth and form-fitting canvas for the intricate details to come. You can choose to create a bodysuit from scratch or adapt a pre-existing leotard or bodysuit for a more streamlined approach.
Let’s explore the process of crafting a base bodysuit from fabric, a method that offers greater control over the fit and design. This section will guide you through creating a pattern, selecting appropriate materials, and tailoring the bodysuit for a comfortable and flattering fit.
A green ivy costume can be a fun and whimsical DIY project, especially if you’re looking for a nature-inspired look. If you’re feeling extra creative, consider adding a touch of whimsy with a miniature stuffed animal zoo, like the ones you can find on this website. You could even make a tiny animal for your costume, like a little squirrel nestled in the ivy.
This would definitely make your costume stand out!
Creating a Bodysuit Pattern
Creating a bodysuit pattern requires a few basic measurements and some understanding of pattern drafting. Here’s a step-by-step guide to help you create a form-fitting pattern for your Green Ivy bodysuit:
- Gather Measurements: Take the following measurements from yourself or the person you’re creating the costume for.
- Bust: Measure around the fullest part of your bust, keeping the tape measure level.
- Waist: Measure around the narrowest part of your waist, keeping the tape measure level.
- Hips: Measure around the widest part of your hips, keeping the tape measure level.
- Torso Length: Measure from your shoulder bone to your waist.
- Inseam: Measure from your crotch to your ankle.
- Shoulder Width: Measure across your shoulders, from one shoulder bone to the other.
- Sleeve Length: Measure from your shoulder bone to your wrist.
- Drafting the Pattern: You can create the pattern using graph paper or specialized pattern-making software.
- Front Panel: Begin by drawing a rectangle on your pattern paper. The width of the rectangle should be equal to half of your bust measurement plus 2 inches for seam allowance. The height of the rectangle should be equal to your torso length plus 2 inches for seam allowance.
- Back Panel: Create another rectangle with the same width as the front panel but a height of your torso length plus 4 inches for seam allowance (2 inches for the top and 2 inches for the bottom).
- Sleeves: Draw two rectangles for the sleeves. The width of the rectangles should be equal to your bicep measurement plus 2 inches for seam allowance. The height of the rectangles should be equal to your sleeve length plus 2 inches for seam allowance.
- Leg Panels: Draw two rectangles for the legs. The width of the rectangles should be equal to half of your hip measurement plus 2 inches for seam allowance. The height of the rectangles should be equal to your inseam plus 2 inches for seam allowance.
- Adjusting the Pattern: Once you have the basic rectangles, you’ll need to adjust them to create a more form-fitting silhouette.
- Front Panel: Draw a curved line from the top center of the front panel to the bottom center, creating a slight inward curve to fit your torso.
- Back Panel: Draw a curved line from the top center of the back panel to the bottom center, creating a slight outward curve to fit your back.
- Sleeves: Round the top edge of the sleeves to create a more natural shoulder shape.
- Leg Panels: Round the top edge of the leg panels to create a smooth transition from the torso to the legs.
- Cutting the Pattern: Once you’re happy with the shape of your pattern pieces, cut them out carefully. You’ll need two of each piece (front, back, sleeves, and legs).
Creating the Ivy Details
Now that the base of your Green Ivy costume is ready, it’s time to add the defining element – the ivy! This section will explore different techniques for replicating ivy foliage, giving your costume a truly captivating look.
Using Fabric Scraps
Fabric scraps offer a versatile and readily available option for creating ivy leaves.
- Choose fabrics with different textures and colors. Silk, velvet, and even cotton can be used to create realistic ivy leaves. Consider using a variety of green shades to add depth and dimension.
- Cut out leaf shapes. Use a pattern or freehand to cut out various leaf sizes and shapes. Remember that ivy leaves have distinct pointed tips and scalloped edges.
- Add texture and detail. You can crinkle the fabric, fray the edges, or even use fabric paint to create veins and patterns on the leaves.
- Attach the leaves to the base. Use hot glue, fabric glue, or even sewing to attach the leaves to your costume base.
Creating Leaves with Felt
Felt is a popular choice for crafting due to its easy-to-work-with nature.
- Select felt colors. Felt comes in a wide range of green shades, allowing you to create realistic ivy foliage.
- Cut out leaf shapes. Use a pattern or freehand to cut out various leaf sizes and shapes. Remember that ivy leaves have distinct pointed tips and scalloped edges.
- Add texture and detail. You can use felt scraps to create a layered effect, or even use a craft knife to create delicate veins and patterns on the leaves.
- Attach the leaves to the base. Use hot glue, fabric glue, or even sewing to attach the leaves to your costume base.
Crafting with Paper, Green ivy costume diy
Paper is a budget-friendly option for creating ivy leaves.
- Choose paper types. Construction paper, cardstock, or even tissue paper can be used to create ivy leaves.
- Cut out leaf shapes. Use a pattern or freehand to cut out various leaf sizes and shapes. Remember that ivy leaves have distinct pointed tips and scalloped edges.
- Add texture and detail. You can crumple the paper, paint it with green hues, or even use a craft knife to create delicate veins and patterns on the leaves.
- Attach the leaves to the base. Use glue, tape, or even sewing to attach the leaves to your costume base.
Achieving Realistic Ivy Textures and Shapes
- Vary the leaf sizes and shapes. Ivy leaves come in a variety of sizes and shapes, so don’t be afraid to experiment.
- Create a layered effect. Overlapping leaves will create a more realistic and natural look.
- Use different shades of green. Adding a variety of green shades to your ivy foliage will add depth and dimension.
- Consider adding other details. Adding vines, stems, or even tiny flowers to your ivy foliage will enhance the realism of your costume.
Assembling the Costume
Now that you have all the individual pieces, it’s time to bring your Green Ivy costume to life! This is where you can really unleash your creativity and personalize your look.
This section will guide you through the process of attaching the ivy details to the bodysuit, creating a layered and realistic ivy effect, and ensuring the details are secure for both durability and comfort.
Attaching Ivy Details
Attaching the ivy details to the bodysuit is a crucial step in achieving a seamless and realistic look. There are several methods you can use, each with its own advantages and disadvantages.
- Hot Glue Gun: A quick and easy option for attaching smaller ivy pieces, especially those made from felt or fabric. Apply a small amount of hot glue to the back of the ivy detail and press it firmly onto the bodysuit. Be careful not to burn yourself.
- Sewing: For a more durable and permanent attachment, consider sewing the ivy details to the bodysuit. Use a needle and thread that matches the color of your bodysuit or the ivy details. Secure the ivy with a few stitches on the back.
- Fabric Glue: This is a good option for attaching larger ivy pieces or those with intricate details. Apply a thin layer of fabric glue to the back of the ivy detail and press it firmly onto the bodysuit. Allow the glue to dry completely before moving on.
- Safety Pins: This is a quick and easy way to attach ivy details that you might want to remove later. Secure the ivy to the bodysuit with safety pins.
Creating a Layered and Realistic Ivy Effect
To achieve a truly realistic ivy effect, it’s important to create layers and depth. Here are some tips:
- Vary the Size and Shape of Ivy Details: Use a mix of large and small ivy details to create a sense of depth and dimension.
- Overlap Ivy Details: Overlap the ivy details to create a more natural and realistic look.
- Add Different Shades of Green: Use different shades of green for the ivy details to add realism and depth.
- Use Varying Textures: Use a combination of materials for your ivy details, such as felt, fabric, and even real ivy, to create a more textured and interesting look.
Securing the Details for Durability and Comfort
Once you’ve attached the ivy details, it’s important to make sure they are secure and comfortable to wear. Here are some tips:
- Reinforce Attachments: If you’re using hot glue or fabric glue, consider reinforcing the attachments with a few stitches or by using a small piece of fabric to cover the glue.
- Trim Excess Ivy: Trim any excess ivy that might be sticking out or feeling uncomfortable.
- Test the Costume: Before you wear the costume, test it out by moving around and making sure the ivy details are secure and comfortable.
Adding Accessories
Accessories can elevate your Green Ivy costume to a new level of visual impact and authenticity. Consider incorporating elements that enhance the overall aesthetic and add a touch of whimsy and elegance.
Headpiece or Crown
A headpiece or crown can add a touch of regality and enhance the overall aesthetic of the costume. Consider incorporating ivy elements into the design for a cohesive look.
- Wreath: A simple yet effective option is a wreath of artificial ivy woven around a headband or wire frame. You can embellish it with small flowers, berries, or even tiny lights for a magical touch.
- Crown: A more elaborate option is a crown crafted from lightweight materials like foam or cardboard. Shape it to resemble a crown and cover it with artificial ivy, leaving gaps for embellishments. Add details like small, delicate flowers, or a miniature bird perched on the crown for an enchanting effect.
- Hair Accessories: For a less dramatic approach, consider incorporating ivy-inspired hair accessories like clips, barrettes, or headbands. Choose accessories that complement the color and style of the costume.
Statement Necklace or Bracelet
A statement necklace or bracelet with ivy motifs can add a touch of elegance and sophistication to the costume.
- Wire Ivy Necklace: A simple and versatile option is a wire ivy necklace. Use wire to create delicate ivy vines and leaves, and attach them to a chain or cord. You can add small beads or charms for extra detail.
- Resin Ivy Pendant: For a more durable and intricate design, consider creating a resin ivy pendant. Mold artificial ivy into a resin mixture and let it cure. The pendant can be attached to a chain or cord for a statement necklace.
- Ivy Bracelet: A bracelet with ivy motifs can be made with various techniques. You can use wire to create ivy vines and attach them to a leather or fabric strap. Alternatively, you can create a beaded bracelet with ivy-shaped beads.
Makeup and Styling: Green Ivy Costume Diy

To complete your Green Ivy costume, consider makeup that enhances the natural, earthy vibe. Think fresh, dewy skin with hints of green and shimmer to capture the essence of the plant world.
Creating a Dewy and Fresh Makeup Look
To achieve a dewy and fresh makeup look, focus on creating a natural base that enhances your features. This can be done by:
- Hydrating the skin: Before applying makeup, ensure your skin is well-hydrated. Use a hydrating moisturizer or serum to create a smooth canvas.
- Using a light foundation: Opt for a lightweight foundation or tinted moisturizer that matches your skin tone. This will help to even out skin tone without looking heavy or cakey.
- Adding highlighter: Apply a subtle highlighter to the high points of your face, such as cheekbones, brow bones, and cupid’s bow. This will create a natural glow and enhance your features.
- Using a cream blush: Cream blush blends seamlessly into the skin and creates a natural, dewy finish. Apply a light shade of pink or peach to the apples of your cheeks.
- Setting with powder: To set your makeup and prevent it from sliding, use a translucent powder. Apply a light dusting to your T-zone and other areas that tend to get oily.
Final Touches

After meticulously crafting your Green Ivy costume, it’s time to add those final touches that elevate it from good to extraordinary. These finishing touches are like the sprinkles on a cupcake – they add a touch of magic and personality, making your costume truly stand out.
Adding Finishing Touches
Think of these finishing touches as the icing on the cake. They are the details that make your costume truly shine.
- Add some sparkle: Consider incorporating glitter or iridescent fabric to give your costume a magical glow. You could even use a glue gun to add small, shimmering green stones or beads to the ivy details.
- Create a custom ivy-themed headband or hairpiece: You could use artificial ivy, green fabric, or even wire and beads to create a stunning headband or hairpiece that complements your costume.
- Play with textures: Add some texture to your costume by incorporating different materials, like felt, tulle, or even real leaves.
- Accessorize with nature-inspired jewelry: Think green stones, wood beads, or even small, delicate flowers.
- Add a touch of personality: Include a small, personalized detail that reflects your own style or interests. This could be a small charm, a personalized name tag, or even a simple ribbon tied around your wrist.
Custom-Made Ivy-Themed Makeup Bag or Jewelry Box
A custom-made makeup bag or jewelry box adds a touch of personal style and keeps your essentials organized. Here’s how to create one:
- Choose your base: Select a plain makeup bag or jewelry box that you can decorate.
- Choose your materials: Use fabric paint, felt, or even real ivy leaves (preserved or artificial) to create your design.
- Add details: Incorporate details like glitter, beads, or small charms for a touch of whimsy.
- Secure your design: Use fabric glue or a sewing machine to attach your decorations to the bag or box.
Creating a Unique Nametag or Label with an Ivy Design
A custom nametag or label is a great way to personalize your costume and add a touch of whimsy. Here’s how to create one:
- Choose your base: Use a plain name tag or label, or create one from cardstock or felt.
- Design your ivy: Use a stencil or freehand drawing to create an ivy design.
- Add details: Incorporate details like glitter, beads, or small charms to enhance your design.
- Secure your design: Use fabric glue, paint, or a sewing machine to attach your design to the nametag or label.
With a little creativity and the right materials, you can transform yourself into a stunning green ivy creature. From the base bodysuit to the intricate ivy details, every step of the process allows for artistic expression. So, gather your supplies, embrace the beauty of nature, and get ready to create a truly unique and unforgettable green ivy costume.

