Recuva free download? Yeah, you heard that right! Losing important files is a total bummer, but thankfully, there’s Recuva, a super helpful tool that can often bring those digital casualties back from the dead. This guide dives deep into everything you need to know about getting, using, and maximizing Recuva, from finding safe download sources to troubleshooting those pesky recovery issues.
We’ll cover everything from the basics to some pro tips, so whether you’re a total newbie or a tech-savvy whiz, you’ll find something useful here.
We’ll walk you through finding the best places to snag the free version, comparing it to the paid version, and then we’ll get into the nitty-gritty of actually using the software to recover your precious files. We’ll also touch on some alternative options if Recuva doesn’t quite cut it. Get ready to become a data recovery master!
Recuva Download Sources
Okay, so you wanna download Recuva, huh? Finding a safe and reliable source is key to avoid malware and get the legit version. This section will cover some trustworthy sites and compare their download processes.
Reputable Recuva Download Sources
It’s crucial to download Recuva from official or well-known sources to ensure you’re getting the genuine software and not some nasty virus disguised as Recuva. Here are five reputable places you can download Recuva from:
- The Official Piriform Website: This is the absolute best place to get Recuva. It’s the developer’s site, so you know it’s the real deal.
- Major Download Portals (e.g., Softpedia, Download.com): These sites vet software before listing them, offering a degree of safety.
- FileHippo: This site focuses on providing clean and up-to-date software downloads.
- SourceForge: While hosting many open-source projects, SourceForge also lists popular software like Recuva. Check reviews carefully.
- CNET Download.com: Another well-known download portal with a reputation for vetting software.
Comparison of Download Processes
The download process is generally straightforward across these sites. You’ll typically find a prominent “Download” button, leading to a .exe file. However, some sites might include additional offers (toolbars, other software) during installation; be vigilant and uncheck these if you don’t want them. The official Piriform site usually has the cleanest download process, directly leading to the Recuva installer.
Other sites might involve additional steps like creating an account or completing a captcha.
Website Security Measures
Security varies between sites. The official Piriform website utilizes HTTPS, which encrypts your connection, protecting your data during the download. Major download portals like Softpedia and Download.com typically employ similar security measures, often including virus scanning of uploaded files before they’re made available. FileHippo and SourceForge also generally use HTTPS and have mechanisms to report malicious software. Remember, always check the site’s security certificate (the padlock icon in your browser’s address bar) to confirm a secure connection.
Download Speed Comparison
Download speeds can fluctuate greatly depending on your internet connection, server load, and geographical location. The following table provides asample* comparison, and your results may differ. These speeds are illustrative and based on anecdotal evidence from recent downloads.
| Website | Download Speed (Mbps) | Time to Download (approx.) | Notes |
|---|---|---|---|
| Piriform | 10-15 | 1-2 minutes | Consistent speed, usually fast. |
| Softpedia | 8-12 | 2-3 minutes | Speed varies depending on server load. |
| Download.com | 7-10 | 3-4 minutes | Can be slower due to ad integration. |
| FileHippo | 9-13 | 2-3 minutes | Generally fast and reliable. |
Recuva Version Comparison

Choosing between Recuva’s free and paid versions depends on your data recovery needs. While the free version is perfectly adequate for many users, the paid version offers enhanced features and capabilities that can be invaluable in certain situations. Let’s break down the key differences.
Feature Comparison: Free vs. Paid Recuva
The core functionality of Recuva remains consistent across both versions. However, the paid version, Recuva Professional, unlocks several advanced features designed to improve recovery rates and streamline the process. The free version is a great starting point, but understanding the limitations is crucial before deciding if the upgrade is worth it.
| Feature | Recuva Free | Recuva Professional | Scenario Example |
|---|---|---|---|
| Deep Scan | Available | Available, with improved speed and efficiency | Recovering files from a severely fragmented hard drive; the paid version’s faster deep scan saves significant time. |
| File Preview | Limited preview for common file types | Enhanced preview for a wider range of file types, including more advanced file formats. | Previewing a corrupted .psd file before recovery; the paid version might allow you to preview and ensure data integrity before committing to the recovery. |
| Scheduling Scans | Not Available | Automated scheduled scans for proactive data recovery | Setting a weekly scan to automatically check for recoverable data on an external drive; useful for backups or infrequently used storage. |
| Advanced File Filtering | Basic file type filtering | More precise filtering options for quicker identification of specific files. | Recovering only specific image files (.jpg, .png) from a large drive, reducing time spent sifting through irrelevant data. |
| Technical Support | Community forums only | Direct access to Piriform’s technical support team | Encountering an unusual error during recovery; direct support ensures quicker resolution of complex issues. |
| Price | Free | Paid (one-time purchase or subscription) | Cost-benefit analysis; weighing the potential value of enhanced features against the purchase price. |
Scenarios Benefiting from Recuva Professional
Recuva Professional shines in situations where data recovery is critical and time is of the essence. For instance, recovering large amounts of data from a failing hard drive would benefit significantly from the improved scan speed and enhanced preview capabilities. Similarly, recovering complex file types or dealing with heavily fragmented data might require the more powerful tools found in the Professional version.
Businesses relying on data integrity might find the scheduled scans and technical support invaluable for proactive data management. The added filtering options can also be a huge time-saver for individuals or businesses recovering a massive number of files.
Recuva System Requirements
So, you’re ready to dive into Recuva and recover those precious lost files? Before you get started, let’s make sure your computer can handle it. Recuva’s system requirements are pretty lightweight, meaning it’ll likely run smoothly on most modern systems. However, understanding the minimum and recommended specs, as well as potential compatibility snags with older operating systems, will ensure a smooth recovery process.Knowing your system’s capabilities helps avoid frustrating performance issues.
A system that barely meets the minimum requirements might run Recuva, but it could be slow and prone to crashes, especially when dealing with large files or complex recovery scenarios. Conversely, a system exceeding the recommended specs ensures a faster, more efficient recovery experience.
Minimum and Recommended System Requirements
The following list Artikels the minimum and recommended system requirements for Recuva. These specifications are crucial for optimal performance and to avoid potential problems during the file recovery process. Meeting at least the minimum requirements is necessary for basic functionality, while exceeding the recommended specs will generally lead to a smoother, more efficient experience.
- Operating System: Minimum: Windows XP; Recommended: Windows 10 or later. Recuva officially supports a range of Windows versions, but performance and compatibility vary.
- Processor: Minimum: 1 GHz processor; Recommended: 2 GHz or faster processor. A faster processor helps speed up the scanning process, particularly when dealing with large drives or numerous deleted files.
- RAM: Minimum: 512 MB RAM; Recommended: 1 GB RAM or more. More RAM allows Recuva to handle larger scans and more complex recovery tasks without slowing down your system.
- Hard Disk Space: Minimum: Sufficient space to store recovered files; Recommended: Ample free space on your hard drive. The amount of space needed will depend on the size of the files you’re recovering. Having plenty of free space ensures the recovery process completes successfully.
Operating System Impact on Recuva Performance
Different versions of Windows can affect Recuva’s performance. While Recuva officially supports a range of Windows versions, newer operating systems generally offer better compatibility and performance. For example, Recuva might run on Windows XP, but the scanning process could be considerably slower compared to its performance on Windows 10. Additionally, certain features or functionalities might be limited on older operating systems due to compatibility issues.
Modern versions of Windows often offer improved file system support and optimized resource management, leading to a more efficient Recuva experience.
Compatibility Issues with Older Operating Systems
Using Recuva on very old operating systems (like Windows XP) might present compatibility challenges. These older systems may lack the necessary drivers or system libraries that Recuva relies on for optimal functionality. This could lead to slower scanning speeds, incomplete scans, or even program crashes. Moreover, security updates and patches for older operating systems are often less frequent, potentially increasing the risk of vulnerabilities and security risks.
While Recuva might technically work, it’s strongly recommended to use a more up-to-date Windows version for the best results and a safer recovery process. Consider upgrading your operating system if you’re experiencing problems with Recuva on an older system.
So, you’re looking for a Recuva free download? That’s totally understandable – data recovery is crucial. But managing payroll is equally important, especially if you’re running a small business; check out intuit payroll for a solid solution. Then, once your finances are in order, you can get back to focusing on that Recuva free download and recovering those lost files!
Recuva Installation Process
Installing Recuva is generally a straightforward process. The software guides you through each step, making it accessible even for users with limited technical experience. However, understanding the process beforehand can prevent potential issues and speed up the installation.Recuva’s installation is typical of most Windows programs. You download the installer, run it, and follow the on-screen prompts. The entire process takes only a few minutes.
Let’s look at the step-by-step procedure.
Step-by-Step Installation with Screenshots (Descriptive)
The following describes the installation process, providing detailed descriptions of what you’d see on your screen at each stage. Remember, these are descriptive representations and not actual images.
- Download Completion and Execution: After downloading the Recuva installer (typically an .exe file), locate the file in your downloads folder. The file icon usually depicts a small, colorful recycling bin. Double-clicking this icon initiates the installation process. A window will appear, likely titled “Recuva Setup.” This window usually contains a progress bar that shows the files being extracted and prepared for installation.
- Welcome Screen and License Agreement: The next screen displays a welcome message from the Recuva developers. It often contains a brief description of the program and a button to proceed. Clicking the “Next” button advances to the license agreement screen. This screen presents the end-user license agreement (EULA). You need to read and accept this agreement to continue.
The text is usually fairly standard for software licenses and details your rights and responsibilities regarding the software’s use.
- Choose Installation Location: This step lets you specify where Recuva will be installed on your hard drive. The default location is usually suggested, and for most users, accepting the default is fine. However, you can browse to a different folder if desired. The screen will show a text field where the path is displayed, and a “Browse” button allows you to change the location.
This section might also show the estimated disk space required for the installation.
- Select Program Components: In some versions, you might be given the option to choose which components of Recuva to install. This could include optional add-ons or extra features. Typically, selecting the default options is sufficient. The screen displays checkboxes next to each component, allowing you to customize the installation.
- Installation Progress: Once you’ve made your selections, clicking “Next” initiates the actual installation. A progress bar will appear, showing the percentage complete. This process typically takes only a short time, depending on your computer’s speed.
- Installation Completion: Once the installation is finished, a confirmation window will appear. This usually includes a checkbox to launch Recuva immediately after installation. You can uncheck this box if you don’t want to run the program right away. A “Finish” button concludes the installation process.
Potential Installation Errors and Solutions
While Recuva installation is generally smooth, some errors might occur. One common error is an insufficient permissions issue. This usually means the user account doesn’t have the necessary rights to install software in the chosen location. The solution is to run the installer as an administrator. Right-click the installer file and select “Run as administrator.” Another potential issue could be a corrupted download.
If the installer fails to launch or behaves erratically, redownload the installer from a trusted source. Finally, insufficient disk space can prevent installation. Free up some space on your hard drive before attempting installation again. These issues are relatively rare and easily resolved with simple troubleshooting steps.
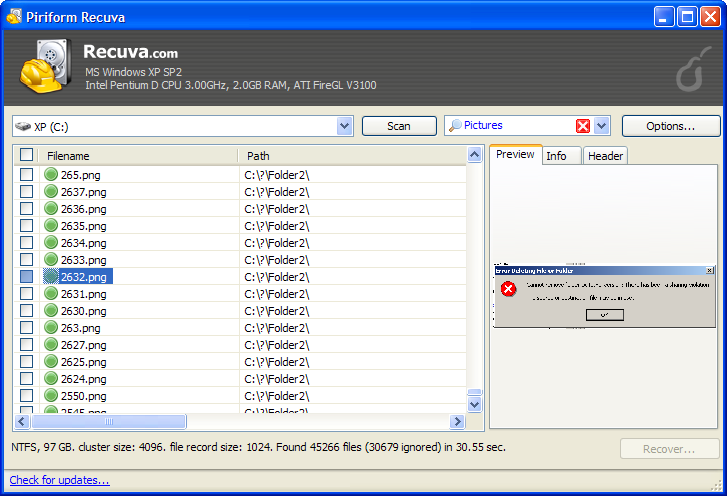
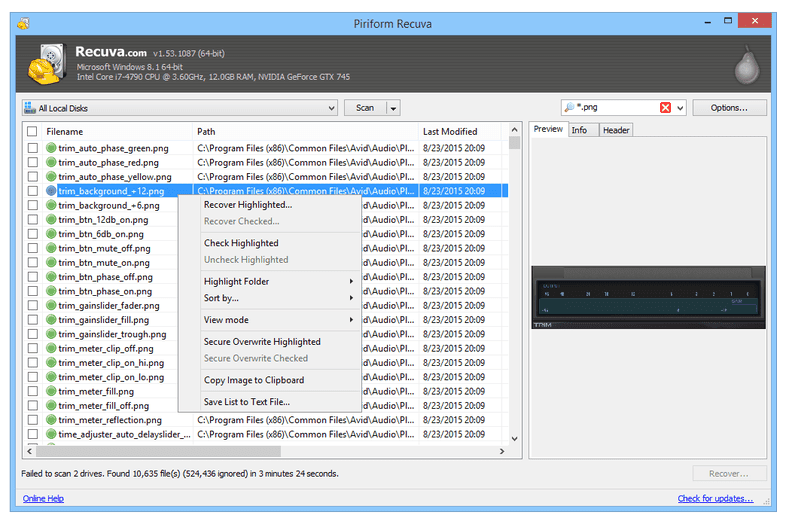
Recuva Usage Scenarios
Recuva’s a lifesaver when you accidentally delete files or your system acts up. It’s surprisingly versatile, handling various file types and recovery situations. Let’s look at some common scenarios where Recuva shines.
Recuva’s strength lies in its ability to recover data from various storage media, including hard drives, SSDs, USB drives, and memory cards. Its effectiveness depends on factors like how long ago the files were deleted and whether the storage location has been overwritten. The sooner you use Recuva after data loss, the better your chances of a successful recovery.
Recovering Deleted Documents
Imagine you were working on a crucial term paper and accidentally emptied the Recycle Bin. Panic sets in, but Recuva’s here to help.
First, launch Recuva. Select “I want to recover specific files,” then browse to the location where the document was originally saved (e.g., your Documents folder). Choose “Document” from the file type filter. Recuva will scan, displaying a list of recoverable files. Select your document, choose a recovery location (preferably a different drive), and click “Recover.” Recuva will attempt to reconstruct the file; the success rate depends on the extent of drive overwriting.
Image and Video Recovery
Lost that amazing vacation video? Or maybe a collection of irreplaceable family photos vanished into the digital ether? Recuva handles this too.
The process is similar to recovering documents. In Recuva, select “I want to recover specific files,” browse to the folder where the images or videos were stored (like your Pictures or Videos folder), and filter for “Image” or “Video” files. Recuva will scan and present a list of potential recoveries. Carefully select the desired files and choose a new location for saving the recovered media.
Again, the speed of recovery and success rate are directly related to the amount of overwriting that has occurred on your drive since the files were deleted.
Recovering Files from a Formatted Drive
This scenario is more challenging but not impossible for Recuva. Let’s say you accidentally formatted a USB drive containing important project files.
Recuva can attempt a deep scan of the formatted drive. Select “I want to recover specific files” and choose the formatted drive as the location. You may want to uncheck the “Enable quick scan” option to allow Recuva to perform a more thorough deep scan, which takes significantly longer but offers a greater chance of recovery. The file types filter can be helpful or left unselected for a comprehensive scan.
Once the scan completes, review the results and recover the desired files to a different drive, as before. Remember, success in this scenario is less guaranteed due to the formatting process overwriting data, but Recuva still provides a chance of recovery.
Recuva File Recovery Process
Recuva’s file recovery process is surprisingly straightforward, even for tech novices. It leverages a combination of quick and deep scans to locate deleted files, offering a user-friendly interface to guide you through the steps. Understanding the nuances of these scan types and the factors influencing recovery success is key to maximizing your chances of getting your lost data back.
The core of Recuva’s operation involves searching your hard drive (or other storage device) for file fragments. When you delete a file, it isn’t immediately erased; instead, the space it occupied is marked as available for new data. Recuva capitalizes on this by searching for those file signatures before they’re overwritten.
Quick Scan versus Deep Scan
A quick scan is a rapid search for recently deleted files. It’s ideal for situations where you recently deleted something and haven’t done much else on your computer since. Think of it as a quick peek – it only checks the readily accessible areas of your storage device. A deep scan, on the other hand, is a more thorough and time-consuming search that meticulously examines every sector of the drive.
This is the go-to option if a quick scan doesn’t yield results or if you suspect the files were deleted a while ago. Deep scans significantly increase the chances of recovery, but they also take considerably longer to complete. The choice depends on the urgency and your expectations. A quick scan for a file deleted minutes ago is perfect; a deep scan is needed for a file deleted weeks ago.
Factors Affecting File Recovery Success
Several factors influence Recuva’s ability to recover deleted files. The most crucial is the time elapsed since deletion. The longer the time, the higher the likelihood that the file’s data has been overwritten by new information. The type of storage device also plays a role; solid-state drives (SSDs) often use more aggressive data erasure techniques compared to traditional hard disk drives (HDDs), making recovery more challenging.
Finally, the file’s size and fragmentation also matter; larger, highly fragmented files are harder to reconstruct completely. For example, recovering a small text file deleted yesterday is far more likely than recovering a large video file deleted a month ago, especially on an SSD.
File Recovery Process Flowchart
The following illustrates the typical steps involved in recovering files using Recuva:
Imagine a flowchart. It starts with “Select Drive/Location.” This branches to “Choose Scan Type (Quick or Deep).” The “Quick Scan” branch leads to “Review Results,” while the “Deep Scan” branch also leads to “Review Results.” From “Review Results,” there are two branches: “Recover Selected Files” and “No Files Found.” The “Recover Selected Files” branch ends with “Files Recovered,” while the “No Files Found” branch can lead back to “Choose Scan Type” for a different approach or ends with “Recovery Unsuccessful.”
Recuva Security and Privacy
Recuva, while a helpful tool for recovering lost files, does present some security and privacy considerations. Understanding these aspects is crucial for using the software responsibly and minimizing potential risks to your data and system. It’s important to remember that no software is completely risk-free, and proactive measures are always recommended.Recuva’s primary function involves scanning your hard drive for deleted files.
This process inherently requires access to a significant portion of your system’s data. While Recuva itself doesn’t transmit this data to external servers, the act of scanning does raise the possibility of unintentionally revealing sensitive information, depending on what’s on your hard drive. The software’s developers, Piriform, have a strong reputation for privacy, but understanding the potential vulnerabilities is key to responsible usage.
Data Handling and Privacy Practices
Recuva’s data handling practices center around the file recovery process itself. The software doesn’t collect or store user data beyond what’s necessary for its operation. This means no personal information like usernames, passwords, or browsing history is collected or transmitted. The recovered files remain on your system, and Recuva doesn’t have any built-in functionality to upload or share them.
However, it’s crucial to remember that the act of recovering files from a deleted state could inadvertently reveal sensitive information if you are not careful about what you recover and where you save the recovered data.
Potential Risks and Mitigation Strategies
Downloading Recuva from unofficial sources presents the most significant risk. Malicious actors could distribute modified versions containing malware or spyware. Always download Recuva directly from the official Piriform website to avoid this. Another risk involves the potential for accidentally recovering files containing sensitive information, such as financial documents or personal communications. Before recovering any file, carefully consider its contents and potential implications.
Always practice safe computing habits and have robust anti-malware software installed. Regularly backing up your important data to an external drive or cloud service is also a wise precaution.
Security Best Practices When Using Recuva
Before outlining specific security best practices, it’s important to emphasize that a layered security approach is best. This means combining multiple strategies for the most effective protection. Using Recuva responsibly involves a combination of caution and best practices.
- Download Recuva only from the official Piriform website.
- Run a virus scan on the downloaded installer before running it.
- Carefully review the files you intend to recover before initiating the recovery process.
- Avoid recovering files if you are unsure of their contents or origin.
- Regularly update your anti-malware software and operating system.
- Consider using a virtual machine to run Recuva if you are particularly concerned about security risks.
Recuva Alternatives
Okay, so you’re digging Recuva, but maybe you’re curious about what else is out there in the wild world of data recovery. Let’s check out some solid alternatives, comparing their strengths and weaknesses against our favorite file resurrection tool. We’ll keep it concise and focused on the practical stuff.
Recuva Alternatives: A Comparison
There are tons of data recovery programs, but three strong contenders that often get mentioned alongside Recuva are PhotoRec, TestDisk, and Disk Drill. Each has its own quirks and advantages, making the “best” choice depend heavily on your specific needs and technical comfort level.
PhotoRec
PhotoRec is a powerful, open-source command-line tool. This means you interact with it through text commands in a terminal window, not a graphical user interface (GUI). It’s known for its ability to recover various file types, even from severely damaged drives. While it’s free, its command-line nature makes it less user-friendly than Recuva; you’ll need some technical know-how to effectively use it.
The upside is its robustness in handling severely damaged media. Think of it as the rugged, reliable, but somewhat less polished option.
TestDisk
TestDisk is another open-source, command-line tool often paired with PhotoRec. It focuses on repairing partition tables and boot sectors, which are crucial for your computer’s ability to evensee* your drives. If Recuva fails because the drive itself is messed up, TestDisk might be able to get things working enough for Recuva (or another program) to then recover your files.
It’s a great tool for advanced users tackling serious drive problems, but the command-line interface can be a barrier for beginners.
Disk Drill
Disk Drill offers a free version with limited recovery capabilities and a paid version with more advanced features. It boasts a sleek, user-friendly GUI, making it very accessible for users of all technical levels. The free version is great for a quick scan and recovery of smaller files, but it might fall short for larger recovery tasks or severely damaged drives.
Think of it as the user-friendly, polished option that might need an upgrade for extensive recovery.
Recuva and Alternatives: Feature and Performance Comparison, Recuva free download
| Feature | Recuva | PhotoRec | TestDisk | Disk Drill (Free) |
|---|---|---|---|---|
| User Interface | GUI – Easy to use | Command-line – Technical expertise needed | Command-line – Technical expertise needed | GUI – Easy to use |
| File Types Supported | Wide range of common file types | Wide range, particularly images | Focuses on partition repair | Wide range of common file types |
| Recovery Success Rate | Good for common scenarios | Excellent for severely damaged media | Excellent for partition repair | Good for common scenarios, limited in free version |
| System Requirements | Relatively low | Relatively low | Relatively low | Moderately higher |
| Cost | Free | Free (open-source) | Free (open-source) | Free (limited), Paid (full features) |
Troubleshooting Recuva Issues
Recuva, while generally reliable, can sometimes throw you a curveball. Understanding common problems and their solutions can save you time and frustration when trying to recover those precious files. This section Artikels some frequent issues and provides straightforward solutions to get you back on track.
Common Recuva Errors and Solutions
Let’s face it, sometimes Recuva just doesn’t work as expected. This section covers some of the most frequently reported errors and their fixes.
| Problem | Possible Cause | Solution | Example |
|---|---|---|---|
| Recuva finds no files. | Incorrect scan location, files overwritten, files deleted from the Recycle Bin, deep scan not performed. | Double-check the selected drive or folder. Try a deep scan. Ensure you haven’t already permanently deleted the files from the Recycle Bin. | You selected “C:\Users\Documents” but the files were actually in “D:\Pictures”. A deep scan revealed the files that a quick scan missed. |
| Recuva shows files, but recovery fails. | File system corruption, bad sectors on the hard drive, the files were overwritten, insufficient disk space for recovery. | Try a different recovery location. Run a CHKDSK on the drive (for Windows). Consider using a different data recovery tool. Ensure you have enough free space on your target drive. | Recuva indicated the files were recoverable, but the recovery process failed due to bad sectors on the source drive. Moving the recovery location to a different drive solved the problem. |
| Recuva is slow or unresponsive. | Scanning a large drive, low system resources (RAM, CPU), software conflicts. | Close unnecessary programs, increase virtual memory if needed, run Recuva as administrator. | Recuva was incredibly slow scanning a 2TB external hard drive. Closing other applications significantly improved its performance. |
| Recuva reports an error message. | Various reasons, including file system errors, hardware problems, software conflicts. | Consult Recuva’s help documentation for specific error codes. Check your system for errors (using system tools). | An error message appeared indicating a file system error on the target drive. Running CHKDSK repaired the drive and allowed successful recovery. |
Troubleshooting File Recovery Failures
Even with Recuva, file recovery isn’t always a guaranteed success. Several factors can contribute to failed recoveries. Understanding these factors can help you improve your chances of success.
Recuva’s Deep Scan and its Effectiveness
A deep scan is Recuva’s more thorough scan option, searching for file fragments even if the file’s directory information is lost. However, a deep scan takes significantly longer than a quick scan. While it increases the likelihood of finding recoverable files, it doesn’t guarantee success if the data has been completely overwritten. For example, if you’ve repeatedly saved files to the same location after deleting the target file, recovery chances are reduced drastically.
Closing Summary
So, there you have it – a comprehensive look at Recuva free download and everything it entails. From finding legitimate download sources to mastering the recovery process and troubleshooting potential problems, we’ve covered it all. Remember, while Recuva is a powerful tool, acting quickly and understanding the limitations are key to successful file recovery. Don’t panic if you lose data – grab Recuva, and let’s get those files back!
Question Bank: Recuva Free Download
Is Recuva safe to download?
Download only from official sources like the Piriform website to avoid malware. Always check the digital signature and reviews before installing any software.
Can I recover permanently deleted files with Recuva?
The chances are higher if you act quickly and haven’t overwritten the space on your drive. Deep scans increase your chances, but it takes longer.
What file types can Recuva recover?
Recuva supports a wide range of file types, including documents, images, videos, audio, and more. However, success depends on the file’s condition and how it was deleted.
What should I do if Recuva isn’t finding my files?
Try a deep scan. Ensure you’ve selected the correct drive and file type. Consider checking your Recycle Bin first, as sometimes files aren’t truly deleted.
Is there a limit to the size of files Recuva can recover?
The free version might have limitations on file size for recovery, while the paid version usually handles larger files more effectively. The success also depends on the file system and available disk space.