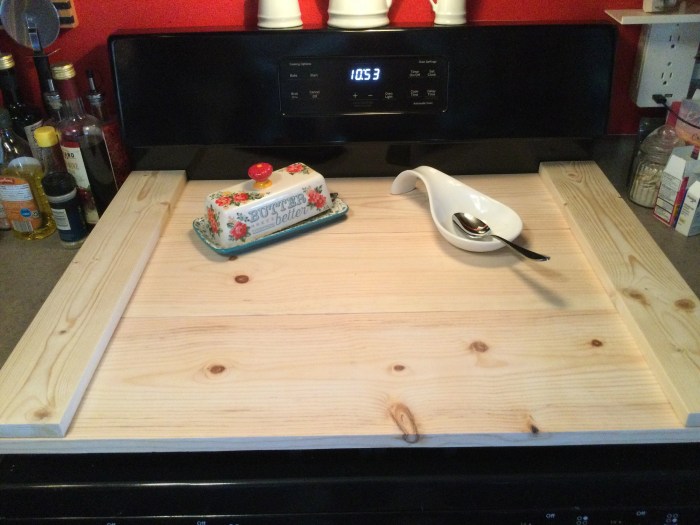
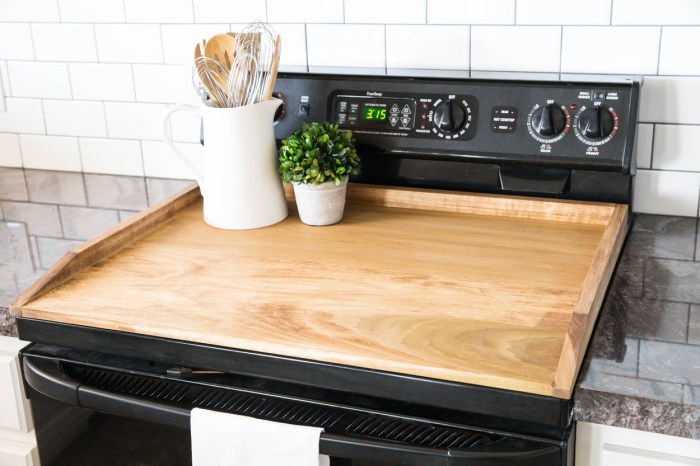
DIY Noodle Board: Imagine a kitchen haven where freshly made pasta dries gracefully, a haven you’ve crafted with your own hands. This isn’t just a noodle board; it’s a testament to your culinary creativity and a practical addition to your kitchen’s aesthetic.
This guide takes you on a journey from concept to creation, offering insights into design, construction, and customization. You’ll discover the versatility of a noodle board, extending beyond pasta drying to encompass serving, storage, and even stylish kitchen decor.
Introduction to DIY Noodle Boards

A DIY noodle board, also known as a pasta board, is a kitchen essential for rolling out dough, especially for making pasta, but it can also be used for other culinary purposes. It provides a flat, stable surface with a smooth texture that prevents sticking and ensures even dough thickness.
Noodle boards offer several benefits, including:
- Even dough thickness: A smooth surface helps to achieve a uniform thickness, leading to consistent cooking times and texture.
- Reduced sticking: Noodle boards are typically made of materials that resist sticking, minimizing the need for excess flour and ensuring a clean, easy-to-work-with surface.
- Versatility: Noodle boards can be used for various tasks, including rolling out dough for cookies, pie crusts, and even fondant.
- Cost-effectiveness: Compared to purchasing a pre-made noodle board, making your own can be more budget-friendly, allowing you to customize the size and material to your needs.
Materials Used for Noodle Boards
Noodle boards can be constructed from various materials, each with its own set of advantages and disadvantages.
- Wood: Traditionally, noodle boards were made of wood, often hardwoods like maple or cherry. Wood is durable, aesthetically pleasing, and offers a natural surface that is easy to clean. However, wood can be prone to warping and scratches over time, and it requires regular maintenance to prevent cracking and drying out.
- Plastic: Plastic noodle boards are lightweight, inexpensive, and easy to clean. They are also resistant to warping and scratches. However, plastic can be less durable than wood and may not provide the same level of stability.
- Marble: Marble noodle boards offer a luxurious and elegant appearance. They are also naturally cool and smooth, making them ideal for rolling out dough. However, marble is a heavy and expensive material that can be susceptible to staining and etching.
- Granite: Similar to marble, granite noodle boards are durable, heat-resistant, and easy to clean. However, they are also heavy and expensive. Additionally, granite can be porous, requiring careful sealing to prevent staining.
- Laminate: Laminate noodle boards are affordable and easy to find. They offer a smooth, non-porous surface that is resistant to stains and scratches. However, laminate can be less durable than other materials and may not be as aesthetically pleasing.
Step-by-Step Construction Guide
Now that you have all the materials, it’s time to assemble your noodle board! This step-by-step guide will walk you through the process, ensuring you have a sturdy and functional board.
Cutting the Wood
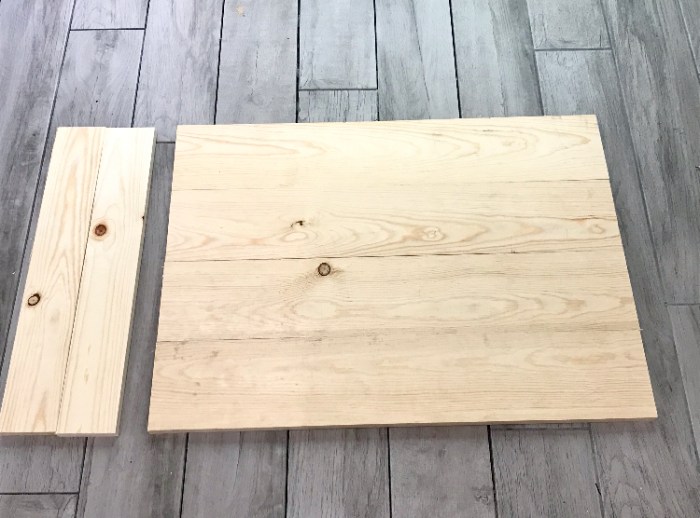
The first step is to cut the wood to your desired dimensions. You’ll need a saw, whether it’s a handsaw, jigsaw, or circular saw, to cut the wood for the board’s base and the frame. Measure carefully and make your cuts precisely to ensure a well-fitting board.
Sanding the Wood, Diy noodle board
Once the wood is cut, it’s essential to sand it smooth. Sanding removes any rough edges and imperfections, creating a smooth surface for painting or staining. Start with a coarse grit sandpaper to remove any major irregularities and gradually work your way to finer grits for a smoother finish.
Assembling the Board
Now, you’ll assemble the board. Use wood glue and screws to attach the frame to the base. Apply wood glue to the edges of the base and the frame, ensuring even distribution. Then, use screws to secure the frame to the base.
Finishing the Board
With the board assembled, you can apply a finish. This can be paint, stain, or even a clear sealant. If you’re painting, choose a color that complements your kitchen decor. If you’re staining, select a color that enhances the natural beauty of the wood. Once the finish is applied, let it dry completely before moving on to the next step.
Adding the Noodle Hooks
The final step is to add the noodle hooks. These can be purchased at hardware stores or online. Attach them to the board using screws or adhesive. Ensure they are spaced evenly and are securely attached.
Finishing Touches and Customization

Your noodle board is built, but now it’s time to make it truly your own. The finishing touches are where you can add your personal style and create a piece that reflects your kitchen’s aesthetic.
Whether you want a sleek, modern look or a rustic, farmhouse feel, there are plenty of ways to customize your noodle board. You can stain, paint, or apply a protective coating to enhance its appearance and durability. Additionally, you can add decorative elements like engravings, stencils, or inlays to create a truly unique piece.
Finishing Techniques
The final step in creating your noodle board is to give it a beautiful and protective finish. There are several options available, each with its own advantages and disadvantages.
- Staining: Staining is a popular choice for highlighting the natural beauty of the wood. It adds color and depth to the grain, creating a rich and warm look. You can find stains in a wide range of colors and finishes, from light and natural to dark and dramatic. Before applying the stain, it’s important to sand the wood to create a smooth surface for even absorption. You can use a brush, cloth, or sprayer to apply the stain. After applying the stain, allow it to dry completely before applying a sealant.
- Painting: Painting is a great option if you want to create a bold and vibrant look. You can choose from a wide range of colors and finishes to match your kitchen’s decor. Before painting, it’s important to prime the wood to ensure that the paint adheres properly. You can use a brush, roller, or sprayer to apply the paint. After applying the paint, allow it to dry completely before applying a sealant.
- Protective Coatings: Applying a protective coating is essential to protect your noodle board from scratches, stains, and moisture. There are several types of protective coatings available, including polyurethane, varnish, and wax. Polyurethane is a durable and water-resistant coating that is ideal for high-traffic areas. Varnish provides a glossy finish that enhances the natural beauty of the wood. Wax is a natural and eco-friendly coating that provides a soft and subtle finish.
Decorative Elements
Beyond the basic finish, you can elevate your noodle board to a true work of art by adding decorative elements. Here are a few ideas:
- Engraving: Engraving adds a personal touch to your noodle board. You can engrave your initials, a special date, or a meaningful quote. You can use a hand-held engraving tool or take your board to a professional engraver for more intricate designs.
- Stencils: Stencils offer a simple and effective way to add patterns and designs to your noodle board. You can find stencils in a wide range of designs, from classic floral patterns to modern geometric shapes. Use a stencil brush to apply paint or stain through the stencil, creating a crisp and clean design.
- Inlays: Inlays involve inserting pieces of different materials into the wood to create a decorative pattern. You can use wood, metal, or even tile for inlays. This technique requires some skill and patience, but it can create a truly unique and stunning piece.
Personalization
The best part about creating a DIY noodle board is that you can personalize it to perfectly match your kitchen style. Here are a few ideas to get you started:
- Match your kitchen’s color scheme: Choose a stain, paint, or protective coating that complements the colors of your cabinets, countertops, and backsplash.
- Incorporate your favorite design elements: If you love rustic charm, consider using a distressed finish or adding some rustic hardware. If you prefer a modern look, opt for clean lines and a minimalist design.
- Add a personal touch: Personalize your noodle board with a monogram, a family crest, or a meaningful quote. This will make it a truly unique and treasured piece.
Maintenance and Care: Diy Noodle Board
A well-maintained noodle board will serve you well for years to come. With a little care, you can prevent warping, cracking, and damage, ensuring your board remains a functional and aesthetically pleasing part of your kitchen.
Cleaning and Maintenance
Regular cleaning is crucial for maintaining the longevity of your noodle board. It helps remove food particles and oils that can lead to discoloration or bacterial growth.
- Hand Wash Only: Avoid dishwashers as the heat and harsh detergents can warp or damage the wood.
- Gentle Cleaning: Use warm, soapy water and a soft sponge or cloth to clean the board. Avoid abrasive cleaners or scouring pads that can scratch the surface.
- Dry Thoroughly: After washing, dry the board completely with a clean towel. Leaving it wet can lead to mold growth and warping.
- Oil Treatment: To prevent drying and cracking, apply a food-safe mineral oil or beeswax to the board every few months. Apply a thin coat and let it absorb for a few hours before wiping off any excess.
Preventing Warping and Cracking
Warpage and cracking are common issues with wooden cutting boards, especially when exposed to extreme temperature changes.
- Avoid Direct Heat: Never place a hot pan or dish directly on the board. Use a trivet or heat-resistant mat to protect it.
- Avoid Extreme Temperatures: Keep the board away from direct sunlight and heat sources. Store it in a cool, dry place.
- Proper Storage: Store the board flat or on end to prevent warping. Do not stack heavy objects on top of it.
Noodle Board Uses and Applications

The versatility of a noodle board extends far beyond its primary function of drying noodles. It can serve as a multi-purpose kitchen tool, adding functionality and aesthetic appeal to your culinary space.
Serving Food
A noodle board can be an attractive and practical serving platter. Its spacious surface provides ample room for showcasing a variety of dishes. For example, you can use it to present a selection of appetizers, a cheese platter, or a spread of finger foods. The raised edges of the board help contain food, preventing spills and making it easier to carry.
Storing Utensils
The open design of a noodle board makes it ideal for storing utensils. You can place spoons, forks, and knives in the grooves, creating a stylish and functional utensil holder. This can free up valuable drawer space and add a touch of rustic charm to your kitchen.
Creating a Stylish Kitchen Display
A noodle board can serve as a decorative element in your kitchen. You can use it to display fresh herbs, spices, or fruits. Its natural wood finish complements various kitchen styles, adding warmth and character to the space.
Creative Culinary Uses
Beyond its traditional and practical applications, a noodle board can be used in a variety of creative ways. You can use it as a cutting board, a serving tray for a charcuterie board, or a base for a DIY pizza oven.
Noodle Board Inspiration
Let your creativity run wild! Noodle boards offer a blank canvas for unique and personalized designs. Explore these examples and get inspired to create your own masterpiece.
Design Aesthetics
A noodle board’s aesthetic can be as simple or elaborate as you desire. Consider these design styles:
- Minimalist: Opt for a clean and uncluttered look with a single color or natural wood finish. Use simple geometric shapes and straight lines for a modern feel.
- Rustic: Embrace the natural beauty of wood with a distressed finish or a combination of different wood types. Incorporate reclaimed wood for a unique touch.
- Bohemian: Add a touch of whimsy with vibrant colors, eclectic patterns, and mixed textures. Use natural elements like rope or leather for a bohemian vibe.
- Modern: Go for a sleek and sophisticated look with bold colors, geometric patterns, and metallic accents. Use epoxy resin for a modern and durable finish.
Material Choices
Beyond the traditional wooden noodle board, explore these creative material options:
- Acrylic: Transparent acrylic provides a modern and clean look. You can easily create a layered effect by incorporating different colors and textures.
- Slate: Slate offers a natural and rustic look. Its cool surface is perfect for displaying cold dishes and appetizers.
- Metal: Metal, such as copper or stainless steel, adds a contemporary touch. It’s also durable and easy to clean.
- Ceramic Tile: Use ceramic tiles to create a mosaic pattern or a unique design. Tiles are durable and come in a wide range of colors and styles.
Finishing Touches and Customization
Personalize your noodle board with these creative finishing touches:
- Paint: Use paint to create a custom design, add a pop of color, or achieve a distressed look.
- Stencils: Use stencils to create intricate patterns or lettering.
- Decoupage: Add a unique touch with decoupage, using paper, fabric, or other materials to create a decorative surface.
- Inlays: Incorporate decorative inlays of wood, metal, or other materials for a personalized touch.
With your DIY noodle board, you’ll have a unique piece that reflects your personal style and serves as a constant reminder of your handiwork. Whether you’re a seasoned DIY enthusiast or a kitchen novice, this project promises a rewarding experience, bringing functionality and flair to your culinary space.
A DIY noodle board is a fun and affordable way to organize your kitchen. You can use it to store utensils, spices, and even small appliances. Once you’ve got your board set up, you might want to clean your makeup brushes to get rid of any lingering residue. A simple makeup brush cleaning solution DIY can be made with just a few common household ingredients.
After cleaning your brushes, you can place them on your noodle board to dry, ensuring they’re ready for your next makeup application.
