DIY sliding doors open up a world of possibilities for enhancing your home’s style and functionality. Whether you’re looking to create a sleek modern look, add privacy to a room, or maximize space in a small area, building your own sliding doors is a rewarding project that can be accomplished with the right tools and guidance.
This comprehensive guide will walk you through every step of the process, from planning and designing to choosing materials, installing the track, and customizing your finished doors. We’ll cover the different types of sliding doors, their advantages and disadvantages, and essential safety considerations. By the end of this guide, you’ll have the knowledge and confidence to create beautiful and functional sliding doors that you’ll be proud to showcase in your home.
Types of DIY Sliding Doors

Sliding doors offer a space-saving and stylish alternative to traditional hinged doors, providing a seamless transition between rooms or creating a dramatic entrance. They come in various styles, each with its own unique advantages and applications. Understanding the different types of sliding doors will help you choose the best option for your home improvement project.
Bypass Sliding Doors
Bypass sliding doors consist of two or more panels that slide horizontally along a track, passing each other. They are a popular choice for closets, pantries, and room dividers.
Bypass sliding doors are typically made from wood, glass, or a combination of both. The panels can be framed or frameless, depending on the desired aesthetic.
Here are some advantages and disadvantages of bypass sliding doors:
- Advantages
- Space-saving: Bypass doors slide along a track, eliminating the need for swinging space.
- Versatile: They can be used for various applications, including closets, pantries, and room dividers.
- Easy to operate: Sliding panels make it easy to open and close the doors.
- Disadvantages
- Limited privacy: Since the panels slide past each other, they may not offer complete privacy.
- Not ideal for large openings: Bypass doors may not be suitable for very wide openings.
Pocket Sliding Doors
Pocket sliding doors are a popular choice for modern homes. They slide into a pocket concealed within the wall, providing a completely unobstructed opening. They are commonly used for bedrooms, bathrooms, and living rooms.
Pocket sliding doors are typically made from wood, glass, or a combination of both. They can be framed or frameless, depending on the desired aesthetic.
Here are some advantages and disadvantages of pocket sliding doors:
- Advantages
- Space-saving: The doors disappear into the wall, maximizing floor space.
- Modern aesthetic: Pocket doors create a sleek and contemporary look.
- Increased privacy: The doors completely disappear into the wall, providing full privacy.
- Disadvantages
- Requires wall space: Installation requires a dedicated pocket within the wall.
- Can be more expensive: Pocket doors are generally more expensive than bypass doors.
Barn Sliding Doors
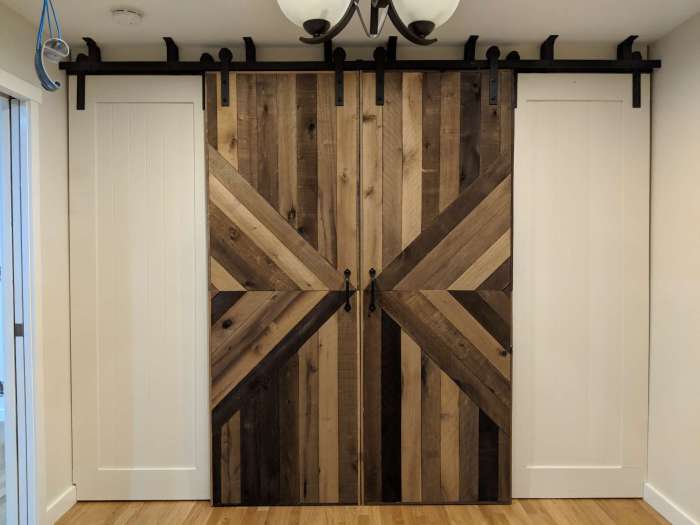
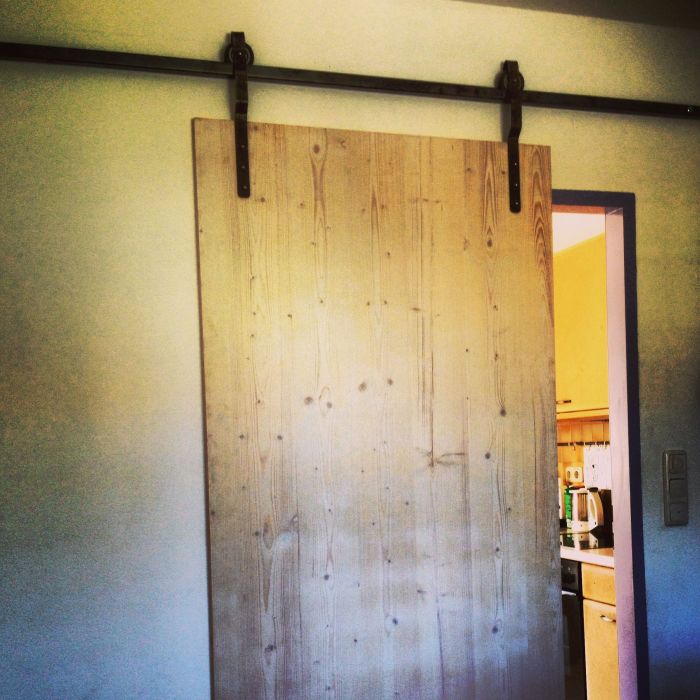
Barn sliding doors are a rustic and charming option for both interior and exterior applications. They feature a single or multiple panels that slide along a track exposed on the wall. They are often used for closets, pantries, and entryways.
Barn sliding doors are typically made from wood, with a variety of finishes and hardware options available. They can be customized with decorative accents, such as reclaimed wood or metal accents.
Here are some advantages and disadvantages of barn sliding doors:
- Advantages
- Rustic charm: Barn doors add a unique and stylish touch to any space.
- Versatility: They can be used for various applications, both interior and exterior.
- Customizable: Barn doors can be customized with different materials, finishes, and hardware.
- Disadvantages
- Limited privacy: The exposed track may not offer complete privacy.
- May require extra wall space: Barn doors need adequate wall space for the track and sliding panels.
Bifold Sliding Doors
Bifold sliding doors consist of two or more panels that fold in half and slide along a track. They are commonly used for closets, pantries, and room dividers.
Bifold sliding doors are typically made from wood, glass, or a combination of both. They can be framed or frameless, depending on the desired aesthetic.
Here are some advantages and disadvantages of bifold sliding doors:
- Advantages
- Space-saving: Bifold doors fold in half, minimizing the required space for opening.
- Versatile: They can be used for various applications, including closets, pantries, and room dividers.
- Easy to operate: The folding mechanism makes it easy to open and close the doors.
- Disadvantages
- Limited privacy: Bifold doors may not offer complete privacy.
- May not be suitable for large openings: Bifold doors may not be suitable for very wide openings.
Planning and Designing Your DIY Sliding Doors

Planning and designing your DIY sliding doors is an exciting step, as you begin to envision the final product. It’s crucial to approach this stage with a methodical approach to ensure your project is successful. This involves careful measurements, material selection, and thoughtful consideration of the door’s size, style, and weight.
Determining Door Size and Style
The size and style of your sliding doors will be influenced by the space available and your personal preferences. Here’s how to approach this:
* Measure the Space: Carefully measure the width and height of the opening where you plan to install your sliding doors. Ensure you have enough clearance for the door to slide smoothly.
* Consider Door Size: Choose a door size that fits the opening while allowing for adequate space to move. For instance, a standard interior door is usually 30 inches wide.
* Style Considerations: Decide on the style of your sliding doors. Will they be single or double doors? Do you want them to be flush with the wall or extend beyond it? Do you prefer a modern, minimalist look, or something more traditional?
* Hardware and Track: The weight and size of the door will influence the type of hardware and track you need. For heavier doors, you’ll require a more robust track and hardware.
* Example: For a standard 30-inch wide opening, a single sliding door with a width of 28 inches might be ideal. This would leave 1 inch on each side for clearance.
Choosing Materials
The materials you choose will impact the durability, aesthetics, and overall look of your DIY sliding doors. Here’s what to consider:
* Wood: A popular choice for sliding doors, wood offers a wide range of options, from traditional pine to more contemporary hardwoods.
* Glass: Glass sliding doors can add a modern and elegant touch to any space. You can choose from clear, frosted, or patterned glass.
* Metal: Metal sliding doors are durable and can be easily customized. Aluminum and steel are common choices.
* Example: For a bedroom closet, a solid wood door might be suitable, while a glass sliding door could be ideal for a bathroom or a living room.
Designing the Track and Hardware
The track and hardware are essential components of a sliding door system, ensuring smooth operation and stability. Here’s how to approach the design:
* Track Type: There are various types of tracks available, including straight, curved, and bypass tracks. The type of track you choose will depend on the configuration of your doors and the space available.
* Hardware: The hardware includes the rollers, handles, and stops. Choose hardware that is compatible with the weight of your doors and the type of track you’ve selected.
* Weight and Balance: It’s crucial to consider the weight and balance of your sliding doors when designing the track and hardware. Heavier doors will require a more robust track and hardware to ensure smooth operation.
* Example: For a heavy wooden door, you might need a heavier-duty track and rollers to support the weight.
Creating a Simple Design
To create a simple design for your sliding door, you can utilize basic carpentry techniques and readily available materials. Here’s a simple example:
* Materials: Pinewood boards, plywood, hinges, track, rollers, handles, and paint.
* Steps:
* Cut the pinewood boards to the desired size for the door frame.
* Attach the boards together using wood glue and screws to form a rectangular frame.
* Cut a piece of plywood to fit the frame and attach it to the frame using screws.
* Attach the track to the wall above the door opening.
* Install the rollers to the door frame.
* Attach the handles to the door.
* Paint the door and frame to your desired color.
Choosing the Right Materials
The materials you choose for your DIY sliding doors will significantly impact their appearance, durability, and overall cost. You’ll need to consider factors like your budget, desired aesthetics, the environment your doors will be exposed to, and the level of maintenance you’re willing to commit to.
Types of Materials
The type of material you choose for your sliding doors will determine their weight, durability, and aesthetics. Here’s a breakdown of common materials and their pros and cons:
- Wood: A classic choice for sliding doors, wood offers warmth, natural beauty, and versatility. It can be stained or painted to match any decor.
- Pros: Natural beauty, warmth, versatility, easy to work with, can be stained or painted.
- Cons: Requires regular maintenance, susceptible to moisture damage, can be expensive.
- Metal: Metal sliding doors are known for their durability, strength, and modern aesthetic. They come in various finishes, including stainless steel, aluminum, and iron.
- Pros: Durable, strong, low maintenance, modern aesthetic, available in various finishes.
- Cons: Can be expensive, can be heavy, can be prone to scratching or denting.
- Glass: Glass sliding doors offer a sleek, modern look and allow natural light to flood your space. They are available in various styles, including frosted, patterned, and tinted.
- Pros: Sleek and modern, allows natural light, can be customized with various styles.
- Cons: Can be fragile, requires careful cleaning, can be expensive.
- Composite Panels: Composite panels are a blend of materials like wood, plastic, and metal. They offer the look of wood with increased durability and moisture resistance.
- Pros: Durable, moisture resistant, easy to maintain, affordable.
- Cons: May not have the same natural beauty as wood, can be difficult to repair if damaged.
Selecting Hardware Components
The right hardware components will ensure smooth operation and longevity for your sliding doors. Here’s a guide to selecting the essential components:
- Tracks: Tracks are the foundation of your sliding door system. Choose tracks made of durable materials like steel or aluminum. Consider the weight of your doors and the frequency of use when selecting the track’s thickness and load capacity.
- Rollers: Rollers are responsible for smooth sliding motion. Choose rollers made of durable materials like nylon or steel, and ensure they have a smooth bearing surface. The size and weight capacity of the rollers should match the weight of your doors.
- Handles: Handles are the main point of contact for operating your sliding doors. Choose handles that are comfortable to grip and durable enough to withstand frequent use. Consider the style of your doors and the overall aesthetic when selecting handle designs.
- Latches: Latches are essential for securing your sliding doors. Choose latches that are easy to operate and provide a secure lock. Consider the type of lock you need, such as a simple latch or a deadbolt, based on your security requirements.
Essential Tools and Equipment: Diy Sliding Doors

Building DIY sliding doors requires a range of tools and equipment, each playing a crucial role in ensuring a successful and safe project. From measuring and cutting to drilling and assembling, the right tools will make the process efficient and enjoyable.
Essential Tools and Equipment, Diy sliding doors
A well-equipped workshop is essential for building DIY sliding doors. Here is a comprehensive list of tools and equipment you will need:
- Measuring Tools: Accurate measurements are paramount for a successful project. Essential tools include a tape measure, ruler, and level.
- Cutting Tools: Depending on the chosen material, you may need a variety of cutting tools. For wood, a circular saw, miter saw, or jigsaw is necessary. For metal, a metal-cutting saw or shears is required.
- Drilling Tools: A drill is essential for creating holes for hinges, handles, and other hardware. A cordless drill with a variety of drill bits is highly recommended.
- Safety Gear: Safety should always be a priority. Essential safety gear includes safety glasses, work gloves, and a dust mask.
- Other Tools: Additional tools you may need include a hammer, screwdriver, wrench, and a clamp.
Safety Precautions
Safety is paramount when working with power tools. Always wear safety glasses to protect your eyes from flying debris. Work gloves protect your hands from cuts and splinters. A dust mask is essential to prevent inhaling dust and wood chips. Always follow the manufacturer’s instructions for each tool and use caution when operating power tools.
Step-by-Step Installation Guide
Now that you have gathered your materials and tools, it’s time to dive into the actual installation process. This step-by-step guide will help you successfully install your DIY sliding doors.
Preparing the Opening
The first step is to prepare the opening where your sliding door will be installed. This involves ensuring that the opening is level, plumb, and the correct size for your door.
- Measure the Opening: Accurately measure the height and width of the opening. Ensure that the measurements are consistent with the dimensions of your door.
- Adjust the Opening: If necessary, use a saw or chisel to adjust the opening to accommodate the door’s dimensions.
- Check for Level and Plumb: Use a level to ensure the opening is level and plumb. Any discrepancies will need to be corrected before proceeding.
- Clean the Opening: Remove any debris or dust from the opening. A clean surface ensures that the door track is properly installed.
Installing the Track
The track is the foundation of your sliding door system. It needs to be securely mounted to the wall or ceiling, depending on your door design.
- Mark the Track Position: Use a level to mark the track position on the wall or ceiling. Ensure that the track is parallel to the opening.
- Attach the Track Brackets: Secure the track brackets to the wall or ceiling using screws or anchors, depending on your wall material.
- Mount the Track: Slide the track onto the brackets and secure it in place.
- Check Track Level: Once the track is mounted, use a level to ensure it is level and plumb.
Hanging the Door
With the track installed, it’s time to hang your door. This involves attaching the door to the rollers and carefully sliding it onto the track.
- Attach Rollers to Door: Attach the rollers to the top of the door. Ensure that the rollers are aligned with the track.
- Lift the Door: Carefully lift the door and slide it onto the track.
- Secure the Door: Once the door is on the track, secure it by installing the door stop or other locking mechanisms.
Adjusting the Hardware
Once the door is hanging, you may need to adjust the hardware to ensure smooth operation. This may involve adjusting the rollers, the door stop, or the track itself.
- Check for Smooth Operation: Open and close the door several times to ensure it slides smoothly.
- Adjust Rollers: If the door binds or doesn’t move freely, adjust the rollers to ensure they are properly aligned with the track.
- Adjust Door Stop: The door stop prevents the door from sliding off the track. Adjust it to ensure the door stops at the desired position.
- Adjust Track: If the track is not level, adjust the track brackets to ensure the track is level and plumb.
Troubleshooting
During installation, you may encounter some common problems. Here are some troubleshooting tips:
- Door Binds: If the door binds, check the rollers and make sure they are properly aligned with the track. You may need to adjust the rollers or the track itself.
- Door Falls Off Track: If the door falls off the track, check the door stop and make sure it is properly secured. You may also need to check the rollers and ensure they are properly attached to the door.
- Door Doesn’t Close Smoothly: If the door doesn’t close smoothly, check the track for any obstructions. You may also need to adjust the rollers or the door stop.
Customizing Your DIY Sliding Doors
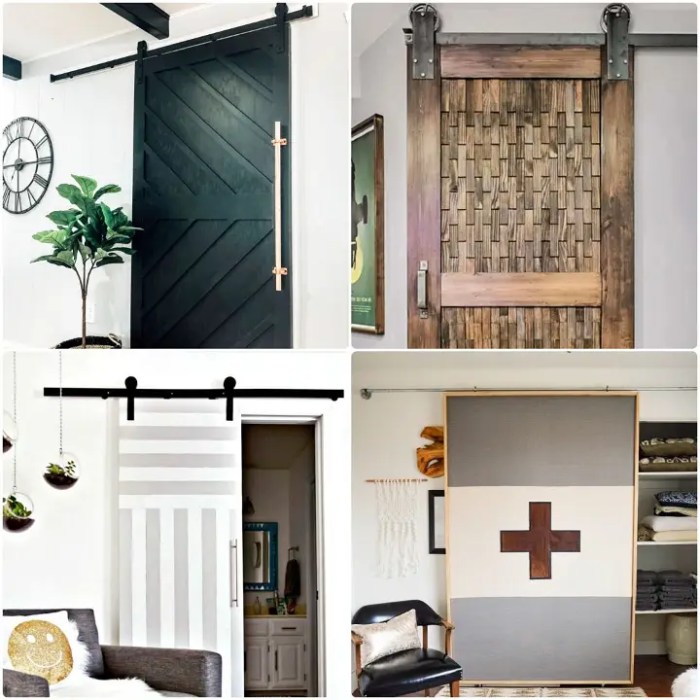
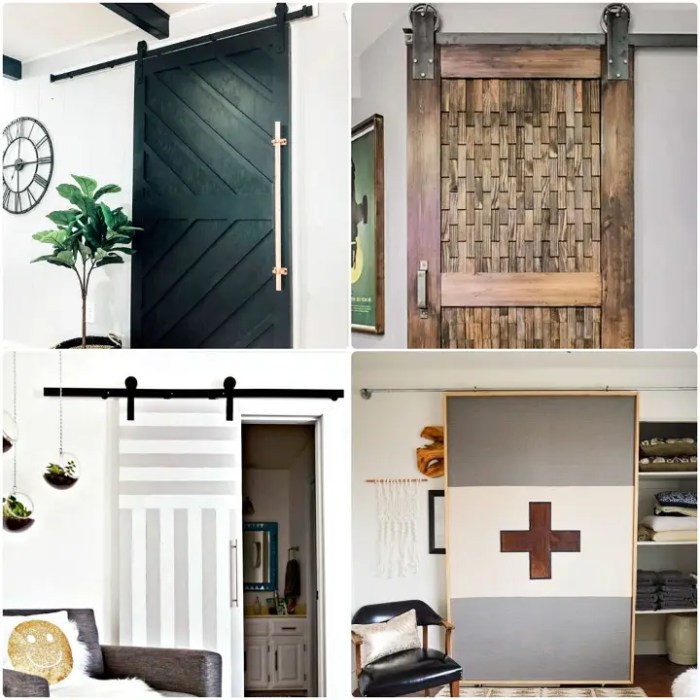
Your DIY sliding doors are a blank canvas for your creativity! Adding personal touches can transform them from functional to stunning, reflecting your unique style and adding a touch of personality to your home. Let’s explore some ways to customize your DIY sliding doors.
Adding Decorative Trim
Adding decorative trim can instantly elevate the look of your sliding doors. This simple yet effective technique can create a dramatic impact, transforming basic doors into elegant statement pieces. You can choose from various trim styles to match your design preferences. For a classic look, consider using traditional moldings like crown molding or chair rail. For a more contemporary feel, opt for sleek, minimalist trim designs.
Painting and Staining
Painting or staining your sliding doors offers endless possibilities for color and finish. A fresh coat of paint can completely change the look of your doors, allowing you to create a cohesive color scheme with your walls or furniture. Consider using bold, contrasting colors for a dramatic effect or choose subtle, muted tones for a more understated look. Staining your doors can enhance the natural beauty of the wood grain, adding warmth and character to your space. Experiment with different stain colors and finishes to find the perfect match for your style.
Incorporating Unique Hardware
The hardware you choose can significantly impact the overall look and feel of your sliding doors. Opt for handles and pulls that complement your door style and personal taste. Consider using antique-style hardware for a vintage aesthetic or modern, minimalist hardware for a contemporary feel. You can even get creative with your hardware choices by incorporating unique elements like leather straps, rope handles, or even repurposed items like old keys or vintage door knobs.
Creating Custom Designs and Patterns
For a truly unique touch, consider adding custom designs and patterns to your sliding doors. There are numerous techniques you can explore to achieve your desired look.
Using Stencils
Stencils offer a simple and effective way to create intricate patterns on your doors. Choose from a wide variety of pre-made stencils or create your own custom design. Simply apply the stencil to the door surface and use paint, stain, or even a woodburning tool to create your design. This technique is ideal for adding geometric patterns, floral motifs, or even personalized messages to your doors.
Wood Carving
For a more intricate and detailed look, wood carving can add a touch of artistry to your sliding doors. This technique requires some skill and practice, but the results can be truly stunning. You can create simple designs or intricate carvings, depending on your experience and desired look. Consider using carving tools to create decorative borders, floral patterns, or even three-dimensional elements.
Decorative Glass Inserts
Adding decorative glass inserts to your sliding doors can add a touch of elegance and privacy. You can choose from various glass types, including frosted, stained, or etched glass, to create unique visual effects. These inserts can be incorporated into the door panels or used to create a decorative window within the door itself. This technique can be particularly effective for adding privacy to a bathroom or bedroom while still allowing natural light to filter through.
Integrating Sliding Doors into Existing Furniture or Architectural Elements
Your DIY sliding doors can seamlessly integrate into your existing furniture or architectural elements. For example, you can create a custom sliding door system for a closet, a bookshelf, or even a room divider. By incorporating your doors into existing structures, you can create a cohesive and stylish look throughout your space. Consider using matching materials and finishes to ensure a seamless integration between your doors and your existing furniture or architectural elements. This technique can be particularly effective for creating a sense of continuity and flow within your home.
With careful planning, attention to detail, and a dash of creativity, building your own DIY sliding doors can be a truly rewarding experience. You’ll not only save money but also gain a sense of accomplishment from creating something unique and beautiful for your home. Remember to prioritize safety throughout the project, and don’t hesitate to seek help or guidance when needed. With a little effort and the right tools, you can transform your home with the elegance and practicality of DIY sliding doors.
DIY sliding doors are a great way to add a touch of modern elegance to your home, and they’re surprisingly easy to create with a little bit of effort. You might even find inspiration for your sliding door project from a surprising source – a DIY pill organizer ! The same principles of organization and functionality can be applied to creating a sleek and efficient sliding door system.
So, get creative and see what you can come up with!

